.webp)
Two shops can own the same cutting plotter and produce completely different results. One delivers crisp letters, sharp corners and stickers that weed in seconds; the other struggles with torn edges, misaligned contour cuts and wasted material. The difference is almost never the machine – it's the process.
This professional cutting guide from Skycut India walks you through the exact workflow professionals use: choosing materials and blades, dialling in settings, preparing cut files, contour cutting printed stickers, weeding, maintenance and fixing common problems.
Key takeaways
- Always run a test cut on every new material or roll before cutting the job.
- Blade depth first, force second: expose just enough blade, then use the lowest force that weeds cleanly.
- Match the blade angle to the material: 30° for fine detail, 45° for standard vinyl, 60° for thick film.
- Clean vectors and straight loading prevent most cutting problems before they start.
What makes cutting “professional”?
Professional cutting means every job meets the same high standard, every time. In practice, that comes down to five qualities:
Accuracy
Cuts follow the design exactly, and contour cuts sit perfectly on the printed outline.
Clean edges
Sharp corners and smooth curves with no tearing, dragging or jagged lines.
Correct depth
The blade cuts the material and adhesive but leaves the liner intact.
Consistency
The first and the last piece of a 1,000-piece order look identical.
Efficiency
Fast weeding, minimal waste and no reprints because of cutting errors.
Reliability
A well-maintained machine that cuts dependably day after day.
The 7-step professional cutting process
Follow this workflow for every job and you'll eliminate most cutting problems before they happen.
Choose the right material
Confirm the material type, thickness and liner, and check it suits the final application (indoor, outdoor, vehicle, packaging).
Prepare a clean vector file
Use closed vector paths, remove duplicate or overlapping lines, convert text to curves and set the correct size.
Fit the correct blade
Pick the blade angle for the material and set the blade depth so it cuts the film but not the liner.
Load the material straight
Align the material with the guide marks, set pinch rollers on the edges and pre-feed long jobs to check tracking.
Run a test cut
Cut a small test shape, weed it and adjust force, speed or depth until it weeds cleanly with a faint mark on the liner.
Cut the job
Send the job from the cutting software, using the right origin, speed and any overcut or multi-pass settings.
Weed and finish
Remove waste material, apply transfer tape or finish the sheet, and inspect quality before delivery.
Pro tip: The perfect test cut weeds easily and leaves only a faint line on the liner. If the liner is cut through, reduce depth or force; if the letters don't lift cleanly, increase force in small steps.
Choosing the right blade
The blade angle decides how deep and how cleanly the plotter can cut. Professionals keep all three angles in stock:
Fine detail
Thin films, small text and intricate designs on thin vinyl and sticker paper.
Everyday work
Standard sign vinyl, printed sticker paper, heat-transfer vinyl and labels.
Thick material
Radium / reflective film, sandblast stencil, flock, magnetic sheet and cardstock.
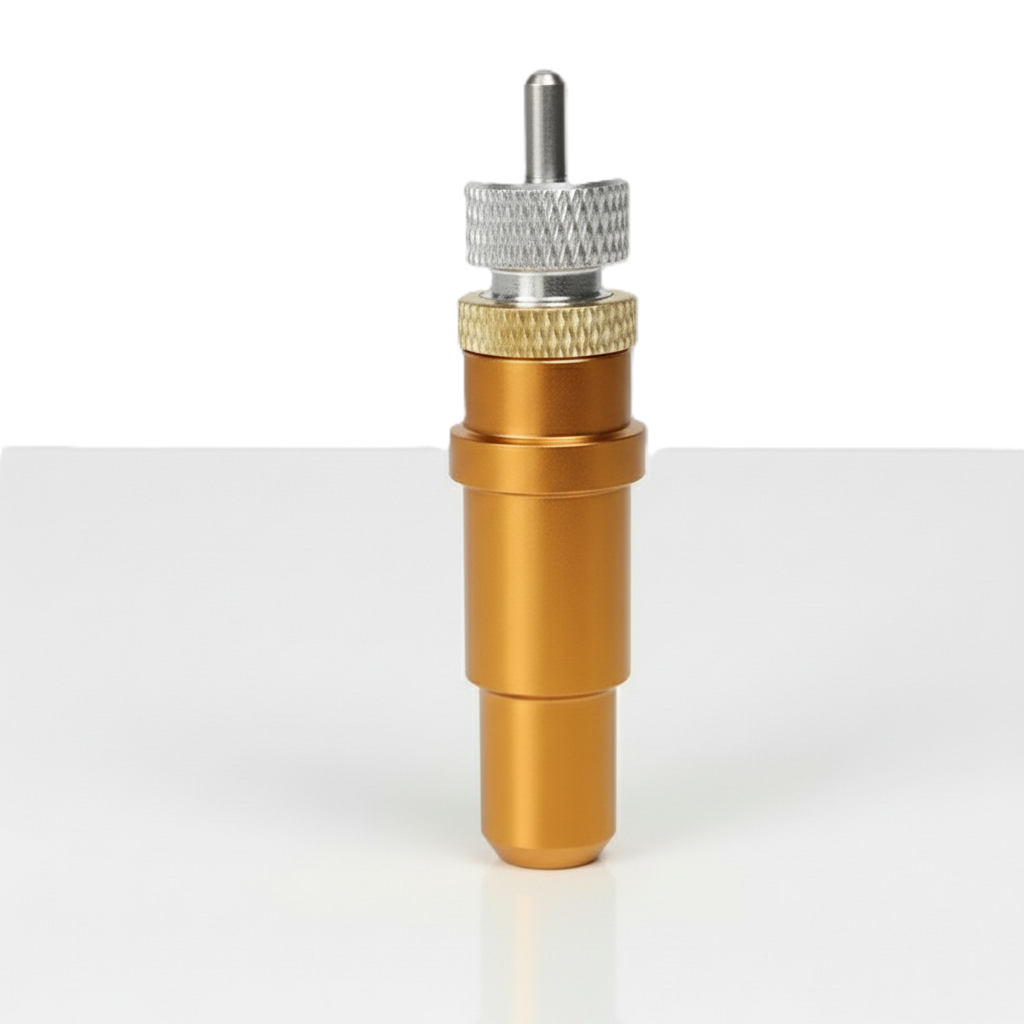
Setting blade depth
- Extend the blade from the holder roughly to the thickness of the material plus adhesive.
- A good starting check: the tip should barely show when you look at the holder from the side.
- Too much exposure cuts the liner and wears the cutting strip; too little leaves incomplete cuts.
- Clean adhesive build-up from the holder regularly so the blade rotates freely.
Cutting settings by material
Use these as starting points, then fine-tune with a test cut. Values vary by brand, thickness and machine.
| Material | Blade | Force | Speed |
|---|---|---|---|
| Standard sign vinyl | 45° | Low–medium | Fast |
| Printed sticker paper / vinyl | 45° | Medium | Medium–fast |
| Heat-transfer vinyl (HTV) | 45° | Low–medium | Medium |
| Radium / reflective film | 45°–60° | High | Slow–medium |
| Sandblast stencil | 60° | High | Slow |
| Cardstock / packaging board | 60° | Very high or multi-pass | Slow |
| Mobile skin film | 45° | Medium | Medium |
- Slow down for detail: small text and tight curves cut cleaner at lower speeds.
- Use multi-pass for thick material: two lighter passes beat one heavy pass that drags the material.
- Use overcut on thick film so closed shapes separate cleanly at the start and end point.
- Save presets for each material you use regularly so every operator gets the same result.
Want professional results from day one?
Skycut India provides installation, operator training, genuine blades and service support across India.
Preparing cut files like a professional
- Use vector formats: CDR, AI, PDF, EPS, SVG or DXF. Trace raster images (JPG/PNG) into clean vectors first.
- Close every path: open paths cause incomplete cuts and shapes that won't weed out.
- Remove duplicate lines: overlapping paths make the blade cut twice and can slice through the liner.
- Convert text to curves so fonts don't change on another computer.
- Weld overlapping shapes in script fonts and logos so they cut as one clean outline.
- Check minimum sizes: very thin lines and tiny text are hard to cut and weed, especially on thick film.
- Add a weeding border around designs to make weeding faster and protect the edges.
- Nest shapes closely to save material on large runs.
Contour cutting printed stickers
Contour cutting (print-and-cut) is where precision matters most. A camera plotter such as the Skycut C Series reads registration marks and cuts along the printed outline. For perfect alignment:
- Print at 100% scale – turn off “fit to page” and printer scaling.
- Keep registration marks clean and high-contrast; avoid placing them near dark artwork or on glossy reflections.
- Add bleed of 1–2 mm beyond the cut line so tiny variations never show a white edge.
- Let laminate and ink settle before cutting so the sheet doesn't curl or stretch.
- Load sheets squarely and calibrate the camera offset if the error is always in the same direction.
.webp)
Weeding and finishing
- Weed soon after cutting, before the adhesive grips harder to the cut edges.
- Start from a corner and peel the waste at a low angle, keeping small pieces pressed down.
- Use proper tools: weeding hooks, tweezers and a light pad for detailed designs.
- Choose the right transfer tape: low-tack for thin vinyl, high-tack for thick or textured film.
- Squeegee firmly from the centre outwards to remove air and help the design release from the liner.
- Inspect before delivery – check edges, alignment and any lifting corners.
Machine maintenance checklist
| How often | Task |
|---|---|
| Daily | Dust the machine, clean the cutting strip, check the blade for chips or build-up. |
| Weekly | Clean pinch rollers and grit rollers, remove adhesive from the blade holder. |
| Monthly | Inspect the cutting strip for grooves, check cables and connections, update software if needed. |
| As needed | Replace blades and worn cutting strips; book a service check if accuracy drifts. |
Keep the plotter on a stable table in a clean, dust-free area away from direct heat, sunlight and humidity, and cover it when not in use.
Troubleshooting common cutting problems
| Problem | Likely cause | Fix |
|---|---|---|
| Incomplete cuts | Force too low, blade too short or dull | Increase force, extend blade slightly or fit a fresh blade |
| Cutting through the liner | Blade exposed too far or force too high | Reduce blade depth first, then lower force |
| Rounded or torn corners | Wrong blade offset, dull blade or speed too high | Set the correct offset, replace blade, reduce speed |
| Shapes don't close | Open vector paths or no overcut | Close paths in the design and add a small overcut |
| Material drifts on long jobs | Crooked loading or uneven pinch roller pressure | Load straight, check rollers, pre-feed the material |
| Contour cut offset from print | Scaling on, dirty marks or camera offset | Print at 100%, clean marks, calibrate camera offset |
Machines for professional cutting
Good technique gets the best from any plotter, but the right machine makes professional results easier and faster:
| Your professional work | Recommended machine |
|---|---|
| Vinyl lettering & everyday sticker jobs | Skycut V24 |
| High-volume vinyl & radium cutting | Skycut VH-24 / VH-48 |
| Printed stickers, labels & mobile skins | Skycut C24 / CX24 |
| Thick film, cardstock & wide jobs | Skycut D24 / D48 |
| Batch sheet cutting & cut-and-crease packaging | Skycut A3 Max 5 |
Keep learning with our guides to smart cutting solutions, the best cutting plotter machine and the best plotter for radium stickers.
Frequently asked questions
Final thoughts
Professional cutting isn't a secret – it's a repeatable process. Choose the right material and blade, prepare clean vector files, load straight, test before every job, weed carefully and maintain your machine. Follow this professional cutting guide consistently and your customers will notice the difference in every sticker, label and graphic you deliver.
.webp)
.webp)
.webp)